Date: 15 March 1997
Author: Christopher Kohlhoff
We've all got to start somewhere, but this tutorial is not going to start with the ubiquitous "Hello, World!". Why? Although, such a program written in OWL is simple, it does nothing in terms of teaching the right way to structure and write OWL applications.
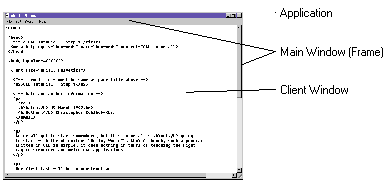
Our first task will be to construct an SDI application. Before we write any code, let's look at the basic structure of such a program, and examine each component in turn:

// Our application class is called TTutorialApp

// and is inherited from TApplication.

//

class TTutorialApp : public TApplication

{

  public:

    TTutorialApp();

    void InitMainWindow();

};


// Application Constructor

// ~~~~~~~~~~~~~~~~~~~~~~~

// All we are doing here is telling OWL what we

// want the name of our application to be.

//

TTutorialApp::TTutorialApp()

: TApplication("Tutorial Application")

{

}


// Create the Main Window

// ~~~~~~~~~~~~~~~~~~~~~~

// InitMainWindow is a virtual function in TApplication.

// We override it to create our own main window and its

// client window.

//

void TTutorialApp::InitMainWindow()

{

  // Create the client window.

  //

  // The first argument to the constructor of a window

  // class is usually a pointer to a parent window.

  // However, when creating a client window we do not

  // specify a parent since the frame window will do

  // that for us automatically.

  //

  TTutorialClientWindow* client = new TTutorialClientWindow(0);


  // Create the frame window.

  //

  // As above, we do not supply a parent window, but this

  // time it is because a main window has no parent.

  //

  // The second argument is the title that we want for the

  // main window (it is displayed in the caption bar). In

  // this case we will use the name that we gave to the

  // application.

  //

  // The third argument is the client window.

  //

  TFrameWindow* frame = new TFrameWindow(0, GetName(), client);


  // Finally, we tell OWL that we want frame to be our

  // main window.

  //

  SetMainWindow(frame);

}
// Our client window class is called TTutorialClientWindow

// and is inherited from TWindow. At this stage it does

// very little of interest.

//

class TTutorialClientWindow : public TWindow

{

  public:

    TTutorialClientWindow(TWindow* parent, TModule* module = 0);

};


// Client Window Constructor

// ~~~~~~~~~~~~~~~~~~~~~~~~~

// This constructor currently does little more than

// call the appropriate base class (TWindow) constructor.

//

TTutorialClientWindow::TTutorialClientWindow(TWindow* parent, TModule* module)

: TWindow(parent, 0 /* window does not need a title */, module)

{

}
// OwlMain

// ~~~~~~~

// OwlMain is where it all starts. You use OwlMain to

// create your application object and run it.

//

int OwlMain(int /*argc*/, char* /*argv*/[])

{

  TTutorialApp app;

  return app.Run();

}
A Note On Header FilesTo speed up the process of compiling, many compilers support what are called precompiled headers. To support this in OWL there is a header file called owl\pch.h which contains all of the core OWL classes (such as TApplication, TWindow and TFrameWindow).To get the best use out of this feature, make sure you include the previously mentioned header file in your source files before any other. Then (in Borland C++) go to the Options Menu and select Project. In the tree on the left, select Compiler | Precompiled Headers. Ensure that "Generate and use" is selected and that "Stop precompiling after header file" is set to owl\pch.h. |
You may notice how we are creating window objects using new but never freeing the memory using delete. There is no need to since OWL does it automatically. Provided a window has a parent window (as do all client windows, even when we don't supply one in the constructor) or it is the main window, then OWL will delete the window itself. However, you can still delete the window yourself and nothing bad will come of it.
Previous Step | Next Step | Tutorial Contents