Getting Started
Manipulating the Selection
- Go to the File menu and click New.
Select Miniature and press OK.
You will now have a blank terrain which is entirely at sea-level.
- Press the button
 on
the Selection Toolbar
(or go to the Selection menu and click Rectangular).
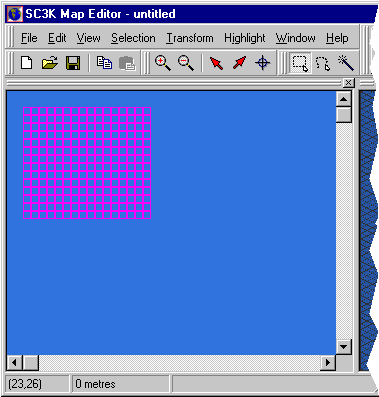
on
the Selection Toolbar
(or go to the Selection menu and click Rectangular). - In the Topological View select a rectangular area that extends from near the top left
to approximately the centre. Your window should look something like:
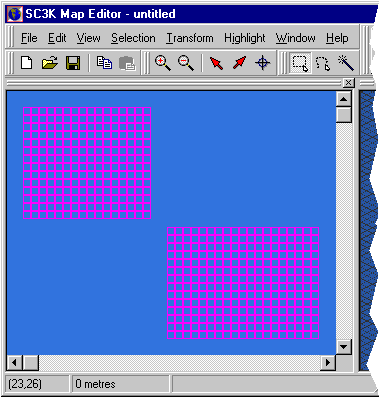
- Holding down the shift key while making a selection causes the newly selected region
to be added to the current selection.
Hold down shift and select a rectangular area that extends from near the centre of the Topological View down towards the bottom right corner. Your window should now look like:
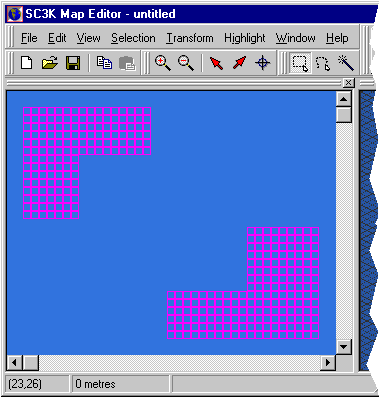
- Holding down the control key while making a selection causes the newly selected region
to be removed from the current selection.
Hold down control and select a rectangular area starting from the centre of the first rectangular selection you made to the centre of the second rectangular selection. Your window should now look similar to this:
- Try out these other items on the Selection menu to see their effect: Select All, Select None, Invert, Grow, and Shrink.
Back to Creating a Gradient
Forward to Creating a River